I wanted to share the super easy tutorial for decorating your own glass and mirrors. The first step is selecting the item you want to frost and then making sure it's completely clean and dry.
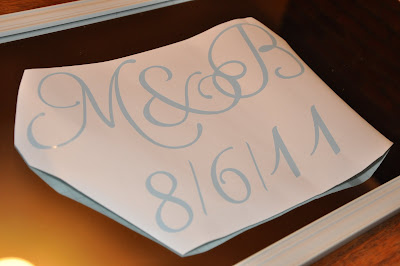
The next step is easiest if you own a machine like a Cricut. Even if you don't you can purchase vinyl cutouts of shapes and letters to create the design. I used my Cricut to cut lemon circles, a monogram and the wedding date into some vinyl. Next, remove all the vinyl that you want to have frosted onto your glass. In this example I removed all of the letters and numbers.

Next, just peel off the vinyl and affix it to the surface you'd like to frost. If the image you are using is delicate, large or has "floating" pieces of vinyl in the design (such as the center of the "&") which might be difficult to place exactly I recommend using transfer paper to move the vinyl from the backing to your project.

Once your design is placed just as you'd like it. Get out a small paint brush and your glass etching cream. I picked up "Armour Etch" from Michaels. It's a small 3 ounce jar but it goes a long way. I did all 3 of these mirrors and 3 other small projects and still have enough left for maybe 2 more small projects.

Using the paintbrush I brush the areas I want frosted with a thick layer of the cream. Make sure it's a good thick layer, otherwise you can get uneven patches. If you're frosting glass (instead of a mirror) I usually look at the backside to see if I missed any areas.
At this point all you do is wait. Follow the instructions on bottle of etching cream you purchased for how long you should wait. My brand suggested 5 minutes but I left it on for at least 15. Once it's ready just rinse it with water and remove the vinyl!

This project also works well as a gift idea. I frosted a trifle container for my mom as a mother's day gift and a casserole dish for my brother and his wife with images from their wedding invitation as a house warming present. The sky's the limit! Happy frosting everyone!


Just a quick note to let you know that a link to this post will be placed on CraftCrave today [18 Aug 01:00am GMT]. Thanks, Maria
ReplyDeleteI found you on C.R.A.F.T., and I just LOVE what you did. I know what I am doing this weekend!
ReplyDeleteBy the way, I am hosting a giveaway right now & would love to have you check it out!
http://sunla-designs.blogspot.com/search/label/Giveaways
Lisa!
Your newest follower!
You're awesome!!! I have a thing for lemon ad citrus and this is all just so beautiful!! great job!
ReplyDelete